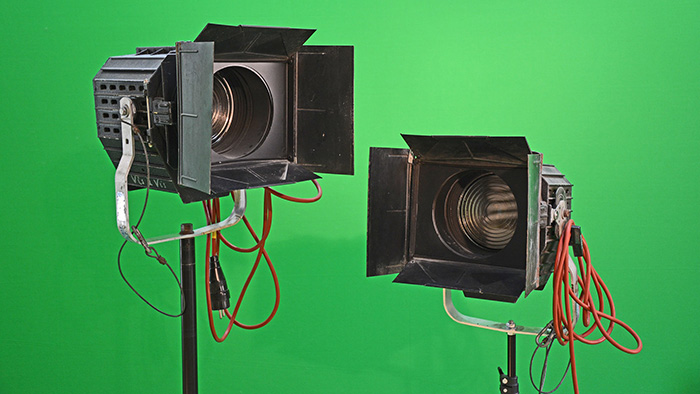
If you are a professional video producer, you’ve probably wanted to shoot a video in a location that’s impossible for you to be physically at. Or maybe you’re a Twitch streamer that doesn’t want people to see the area you are streaming from because you don’t want to ruin the immersion. Either way, by using a green screen, you can easily replace the background of your shot with any scene of your choosing. The problem is that producing quality green screen effects requires equipment that most people assume would be expensive, but as we’ve discovered, it doesn’t have to be. While doing our research, we were incredibly surprised by the quality kits that were available and their surprisingly low price points. That’s why we’ve created this guide to help people to choose the best green kit for their studios.
What Are Greenscreens and How Do They Work?
A green screen is nothing more than a large sheet of fabric that is a particular color, typically bright green. The chroma keying effect is done by configuring software or a device to subtract a specific color from the frame, leaving what is leftover, which is then layered on to a background or video. It is important to understand that the screen does not necessarily have to be green, but whatever color is chosen for the background should not exist in the foreground of the image. Typically, bright green is selected for shooting models indoors because that color will contrast with their clothes and skin tone. The more contrast and the more consistent the lighting of the background, the better the effect will look.
Why You Should Buy a Kit Rather Than Trying To Make Your Own Green Screen
You may already have some indoor lighting and thought, “Why can’t I just buy some green fabric and make my own green screen?” We thought that too and tried to make our own, but ended up not using it after struggling with it endlessly. Simply put, the project was a big waste of our time, and the video we produced did not look professional. We had enormous trouble lighting the screen consistently, and portions of the effect would fade out because there was slight color variation, which ruined the video. We also had a lot of trouble getting the fabric to lay flat, even after we ironed it, and our solution to hang the fabric didn’t go as well as we thought it would. After that experience, we can say with confidence that it would have been a much better use of our time to buy any one of the kits on this list.
Top Green Screen Kits
#1 Neewer Small Green Screen Kit
Features
- Three 6 by 9 Foot Backdrops (Black, White, and Green)
- Two 23.5 Inch Softbox Lights
- Two 33 Inch Umbrella Lights
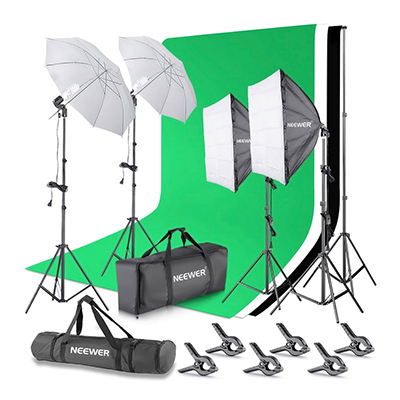
The top spot on our list is the kit from Neewer because of it’s low-cost, the included lights, and the three included backdrops. This kit isn’t just an excellent green screen background, but the lights are also usable for many other situations, and we like the choice of 5500K blubs instead of the 6500K blubs that some of the other kits have which can look a little bit blue. The softboxes are excellent for lighting the background while the two umbrella lights are suitable for use as your key and fill lights.
What You Get in the Kit
The four included 45-watt compact fluorescent light bulbs are about 80% more efficient than traditional incandescent bulbs. That means they are about 800 or so watts equivalent of light that doesn’t produce as much heat compared to conventional incandescent bulbs. Cooler lights are excellent because you won’t sweat as much under the lights. The color temperature of these bulbs is 5500K, which is the same color as the sun at mid-day and shouldn’t look too blue. There are four total lights, two softboxes, and two umbrella lights. This configuration of lights is useful for many other applications since it is a four-point light kit and can be used without the background.
You also get two tripod stands for the background and the crossbar, which you can drape your background over, using the included six spring clamps to keep in place. You get to choose from one of three different cloth backgrounds, Chroma Key green, black, and white. The entire kit comes in cloth bags that are great for storage or transportation; just make sure to save your light bulb boxes.
Setting Up The Lights
To assemble the softboxes, just push the quick expansion ring into place to fully extend the umbrella arms and then screw the bulb into the fixture. The light tripod stands can be quickly assembled, just snap the light fixture into the stand and tighten it down with the quick screw knobs. After extending the legs of the tripod and adjusting the height with the quick clamps, just plug your light in, and it’s ready to use. The only major difference when assembling the umbrella lights is that you have to screw the bulb into the fixture, then open the umbrella, insert it into the fixture, then tighten the umbrella down with the quick screw knob.
Setting Up the Background
The background isn’t any more difficult to set up than the lights, just expand the legs of the two tripod stands and tighten them down. The top of the crossbar slips in through holes on each end and then is tightened down with wing nuts. One thing we want to mention here is that it’s going to be easier to attach the top crossbar before the stands are extended to their desired height. Doing so will also make it easier to attach the background to the top of the stand.
Final Thoughts
Overall this is our most recommended kit on the list. The only issue we have with this kit is that to light the green screen properly, you will have to use both of the softboxes to light the background. This means that you’ll need another light to light the subject with three-point lighting correctly. This isn’t a big problem if you use the other background colors, as you shouldn’t need to use both lights on the background. None of the other lights on our list come with any more lights, so this kit still stands out as our favorite.
Pros
- Easy To Assemble
- Comes With Everything You Need In Nice Carrying Bags
- 5500K Bulbs Are The Color of The Sun at Mid Day
- Great Value, Lights are Usable for Other Situations
- Background Stand is Surprisingly Sturdy
Cons
- The Six Background Clips Are Plastic
- You Still Need Another Light For Three Point Lighting
- No Top Light
- Fluorescent Lights Can Sometimes Look Unnaturally White
#2 LimoStudio Chromakey Green Screen Kit
Features
- Simplistic Background Kit With Three Lights
- Two Umbrella Lights With 6500K Bulbs
- Large 10 Foot by 20 Foot Backdrop
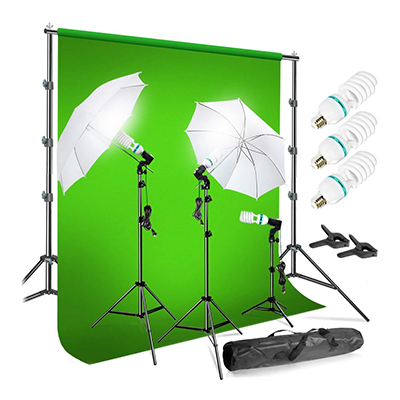
The reason we choose this kit from LimoStudio as number two on this list is that we feel that it’s an excellent kit for somebody who already has an existing three-point lighting setup and wants to add a green screen. One thing we want to point out is that this is a large green screen, and we recommend that you consider the dimensions of the room you are planning on placing this screen inside before purchase. Since the cloth is long enough to wrap to the floor, this screen is an excellent choice for taking a video of a model that is standing.
What You Get in the Kit
You get a large 10-foot by 20-foot green screen on a sturdy stand that can be adjusted with two clamps to keep the screen in place. There are two 86-inch light stands, one single 28-inch stand, three 45 Watt 6500K compact fluorescent bulbs, and two umbrellas. You also get a nice bag that you can pack the stand into if you want to store it or travel.
Setting Up The Background
One thing that we like about the included screen is that it is stitched at one end so that the bar feeds through the cloth screen. The stitching is nice because of the size of the green screen, and you only get two clamps to hold it into position. It’s important to remember that after assembling the two support stands and attaching one side of the crossbar, that you feed the bar through the cloth screen before attaching it to the other side. We always recommend that you start with the background stands at a low position so that it’s easy to work with the crossbar. Once you have the crossbar and two stands fully assembled, then you can easily raise the bar to the desired height.
Setting Up The Lights
If you have ever assembled photography lights, then these lights are about as easy as it gets to set up. Just screw the bulb into the light fixture, then snap it onto the tripod stand, and then tighten down the hand screw. It’s easy to set up the umbrellas, just expand them until they lock, slide the bar into the hole in the light fixture, then tighten the hand screw.
Final Thoughts
One thing that bugs us about this kit is the fact that there are three lights, but the kit only comes with two umbrellas. The third light is still useful as a backlight even without a softbox or umbrella, but we think most people will likely just keep the extra bulb in the box and combine the kit with their existing light setup. The 6500K bulbs tend to be slightly blue, but that shouldn’t be a big deal if they are being used to light the green screen exclusively. We would have preferred 5500K bulbs, as we feel that would have added some versatility to the kit.
Pros
- Large Background is Excellent for Standing Models
- Sturdy Stand Construction and Stitched Cloth Background
- Compact Fluorescent Lights are Cool Compared To Incandescent Bulbs
- Two 86 Inch Stands Are Useful for Lighting Background
Cons
- Only One Screen, No Other Colors like Black/White
- Single Short Light Stand without Umbrell is Odd and Doesn’t Make Much Sense
#3 Linco Video Studio Light Kit
Features
- Three Five by Ten Foot Backdrops
- Four 8.5 Watt Lights (60 Watts Equivalent – 800 Lumens)
- Two Soft Boxes and Two Umbrellas
This kit from Linco is comparable to our number one recommended kit from Neewer, with one major difference; LED bulbs instead of compact fluorescents. We feel the biggest problem with the kit is the included bulbs, as typical compact fluorescent bulbs that come with these kits produce around 1,800 lumens of light. The LED bulbs in this kit unfortunately only produce 800 lumens. This kit is one of the most cost-effective kits that made our list, but the included bulbs may not be adequate to light your green screen.
What You Get in the Kit
This kit comes with three backdrops, in Chroma Key green, black, and white. These backdrops feature ring hangers, meaning the backdrop hangs from the stand, rather than being clipped on with clamps. We feel the rings are a lot easier to work with than the clamps as there is no risk of the screen falling. There are four light stands, two for the included softboxes, and two for the two umbrella lights. You also get the stand that the screen hangs from and a single carrying bag for the entire kit.
Let’s Talk About The Bulbs
As we mentioned previously, the LED bulbs that come with this kit are likely not going to be adequate to light a green screen properly. 800 Lumens per bulb may be enough for you depending on the lighting situation in the room you are working, but we think that most people will have to replace the included bulbs that produce more light. The color temperature of the included bulbs is 5000K, which is the light temperature of daylight. Now we fully admit that a professional photographer is probably going to take issue with all the included bulbs in any of these kits, so don’t think that having to buy different bulbs is necessarily a problem.
Final Thoughts
We like this kit a lot, and that’s why we’ve included it as number three on our list. It’s very comparable to the kit from Neewer, and it cost less at the time that we wrote this, but if you end up having the replace the bulbs, you have to think about that extra cost. The ring hanging system is nice, the kit assembles quickly, and overall it’s a great value.
Pros
- Overall a Great Value
- Ring Hangers Are a Nice Touch
- 4 Included Light Stands
Cons
- The Included LED Bulbs Are Probably Not Bright Enough For Most People
#4 StudioFX Photo Studio Lighting Kit
Features
- Three 10-Foot by 10-Foot Backdrops
- Two 80 Inch Light Stands with Umbrellas
- Single Carrying Bag
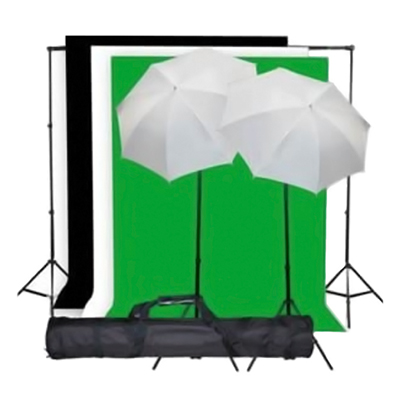
This Kit for StudioFX is an excellent choice for anybody who already has adequate lights for lighting their subject and just wants to add a green screen. The screen is not as large as some of the other options that made our list, but a 10-foot by 10-foot screen is still quite large and should meet most people’s needs. If you don’t need a huge screen and already have lights, this kit is certainly worth a look.
What You Get in the Kit
The most important part is the screen, which comes in three colors, Chroma Key green, black, and white. One issue you need to know if you buy this kit is that it does not come with any clamps to secure the screen to the stand. You could drape the screen over the crossbar, but that’s not ideal, so make sure you have clamps or that you remember to buy some. The included stand is easy to set up and tightens down with hand screws. You also get two light stands and two 5500K 85 Watt compact fluorescent bulbs, which is perfect for lighting the green screen.
Final Thoughts
This kit is great if you just want a background screen kit to add to your equipment arsenal. The included lights are adequate light, evenly lighting the relatively small screen, and the bulbs are a nice and natural 5500K light temperature. The only issue we had with this kit is the missing clamps to keep the screen position, which is a pretty easy fix.
Pros
- Simple and Effective Kit
- Great Price
- It’s Nice to Have Three Colors of Screens
Cons
- Missing Screen Clamps is a Bummer
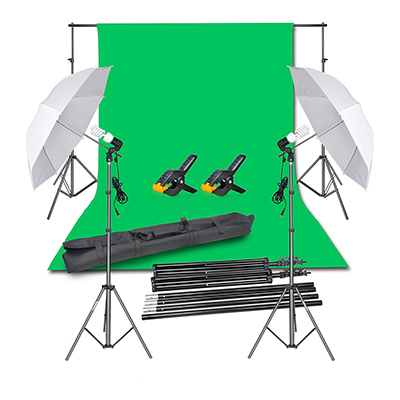
#5 Emart Continuous Lighting Kit w/ Chromakey Green Screen
Features
- 6 Foot by 9 Foot Basic Green Screen
- Two Umbrella Lights
- Two 45 Watt 5500K Bulbs
This Kit from Emart is one of the cheapest options on the list, but there’s an important reason why; You only get a Chroma Key green backdrop. This kit is perfect for somebody who already has a lighting kit for their subject and has no use for any other backdrops. We really don’t have anything bad to say about this kit; it’s simple, effective, and cheap as long as you don’t need anything else.
What You Get in the Kit
The included six-foot by nine-foot green screen is stitched at the top to keep it stable on the included stand. You also get two spring clamps to secure the backdrop if needed. The included light stands are adjustable from 27 inches to 75 inches and come with quick mount umbrellas. The included bulbs are what you would expect from a kit like this and are 45-watt compact fluorescents with a light temperature of 5500K. You also get a handy bag to throw the kit into for storage.
Final thoughts
If you don’t want to spend a lot of money and you just need a basic green screen kit, this option could be right for you. Nothing is lacking in the kit, and if you don’t need additional lights, then the two included lights should be adequate to light your green screen evenly.
Pros
- Great Price
- 6 by 9 Foot Screen
- Adequate Lighting
Cons
- Could Use More Screen Colors
- Spring Clamps Would Have Been Nice
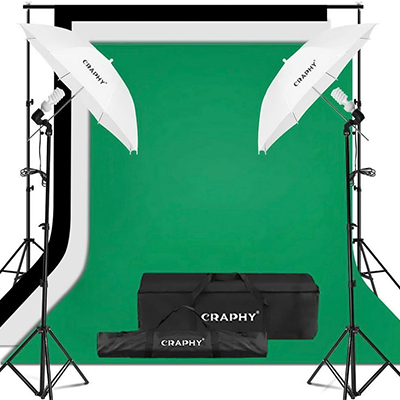
#6 CRAPHY Lighting w/ Muslin Backdrop Kit
Features
- 9 Foot by 6 Foot Backdrops in 3 Colors
- Two Adjustable Light Stands, up to 80 Inches Tall
- Two 5500K Compact Fluorescent Bulbs
This Kit from Craphy is similar to many of the other kits that have made our list, and we included it because it’s another great option if you already have a lighting kit and just want to add a background kit. One thing that sets this kit apart from the rest is the 9-foot by 6-foot backdrop, which is slightly smaller than some of the other options on our list.
What You Get in the Kit
There are three included backdrops in the kit, coming in the colors you would expect, Chroma Key green, black, and white. The background support system is made from aluminum alloy and consists of two tripod stands and four crossbar sections, which stands a total of 10-foot by 6.5-foot. You also get two umbrella lights that can have their height adjusted between 26.35 inches and 80 inches. The included energy savings bulbs are suitable for any E27 socket and produce 5500k light. You also get two bags to throw all of your stuff in when you’re not using it, just remember to save the packaging that the bulbs come in so that you can safely store them.
Final Thoughts
This kit is simple and effective. If you are looking for a cheaper kit and already have plenty of lights for your subject, this kit is worth considering. It’s as easy to assemble as any of the other kits that made our list and comes with pretty standard lighting. The only thing we would have liked to see in this kit would have been some spring clamps to keep the screen taught.
Pros
- Simple and Effective
- Almost Everything You Need From a Background Kit
- Three Screens is Better Than One
Cons
- Some Spring Clamps Would Have Been Nice
#7 ePhoto Muslin Chromakey Background Kit
Features
- Two 4x Lights for Brighter Lighting
- 10 Foot by 20 Foot Green Screen
- Included Hair Light On Boom Stand
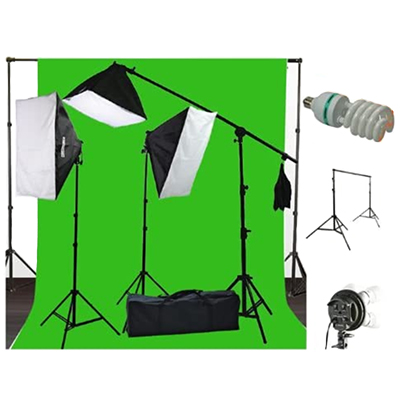
This kit from ePhoto is another green screen kit that features a large screen that is 10-foot by 20-foot. The thing that makes this kit unique is that two of the lights included have four light sockets for four bulbs. This means that you are going to have a lot more light with this kit compared to any other on our list.
What You Get in the Kit
The screen that comes with this kit is a large screen that is 10 feet by 20 feet. That may not seem all that big, but it’s important to consider the dimensions of the room that you plan on putting it in. The lights are what makes this kit stand out from the rest, you get a total of nine 60 watt compact fluorescent 5500K bulbs, that are the equivalent of 2700 watts of output. Instead of umbrella lights, you get two softboxes that house the two four-light fixures that have on and off buttons. You also get a hair light on a boom stand, which is kind of an odd thing to have included in this kit.
About That Hair Light
We don’t like counterweighted hair lights and feel that lights mounted from the ceiling are a far superior option. We realize that drilling holes in your ceiling to mount lights is not an option for many people, but this style of hair light has a lot of usability problems. You’re going to have to fill the counterweight bag with something pretty heavy like rocks, and once it’s set up, even the slightest bump will cause it to come toppling over.
Final Thoughts
Overall, this is a great kit if you need more light and are willing to pay a bit more for it. At this price level, we would have expected to get three screens and some clamps to keep it secure. As far as the hair light, that’s something that we would expect in a standard lighting kit and not a green screen kit. If you only plan to use the included light occasionally, it might do the job for you. Just make sure you either dismantle it or lower it as low as you can when you are done with it. Trust us, that style of a counterweighted boom is very unstable, and even the slightest nudge could send it crashing down.
Pros
- Large Green Screen
- High Output Lights
- Relatively Cost-Effective Considering the Lighting
Cons
- Could Have Used More Screen Colors
- Hair Light Seems out of Place in the Kit
Things To Consider When Buying a Green Screen Kit
Size and Positioning
We highly recommend that you think carefully about the shots that you are going to be making and do a mock-up shot. Make measurements to estimate the size of the screen then mark where the corners of the screen will be with chalk or something else that can be cleaned up later. Set up your camera in the location where it will be and then ensure that the subject will fit nicely in front of the screen without any of the edges showing. You may also want to test out any different lenses and zoom settings that you might use at this time. Also, do not forget to factor in the size of the stand; usually, they can not be placed flush with a wall and will protrude slightly from it. While doing these mock-ups, you also want to think about where you will be positioning your lights.
Material of Backdrop
Most backdrops are Muslin cloth, which is not a big problem for most, but some light will penetrate from behind. One nice thing about the kits that come with multiple backdrops is that you can layer the three colors to eliminate most of the light seepage. Cloth backdrops will need to be ironed flat as cloth backdrops typically come folded up in the package.
Quality
One thing that all of the kits in our list have in common is that the light stands are slightly on the flimsier side. You’re not going to have any issues as long as you understand that they are only designed to support the lights included, and you should not be mounting additional equipment to the stands. Professionals prefer light stands that are heavy duty and more sturdy, but they also cost much more.
Difficulty To Setup
All the kits that we have mentioned should be relatively easy to set up and position. The lights and stand can be easily built from the included parts, which involves sliding one tube into another and tightening the adjustment levers. One thing that is not included and that you will probably need would be some power strips and extension cords to plug your lights in. The biggest issue you are likely to encounter is positioning the lights correctly, but hopefully, you planned that out before the purchase.
Accessories Such As Lighting
The most critical part of getting a Chroma Key effect to look proper is to get the green screen lit correctly. We highly recommend that you use a green screen app to assist you in positioning your lights in a way that avoids hot spots. Since you are going to need two lights at minimum to light the screen evenly, you will need additional lights to light your subject properly. Some of the kits on our list only come with two or three lights; those lights are for illuminating the green screen and not your subject.
Portability
Some of the kits we’ve mentioned come with travel bags if you need to take your green screen to a different location. As nice as these bags are, it can be tedious to disassemble all of the lights and pack them into the bags, and we often find that most people prefer to drop the light canopy and move the lights while they are still on their stands. If you only plan to use your screen occasionally, we find that the bags are usually better for long term storage.
Cost
All of the kits on our list are on the affordable side, and you should be able to produce near professional-quality video with them, but professional green screens can cost $200 or more. The kits we choose should be affordable for most people, and we found that there no reason to try to save a small amount by attempting to make a screen from cloth or using improper lighting. Some studios will actually dedicate an entire room by painting the room Chroma Key Green and setting up professional level lights that can cost $500 or more each. We find that the difference in quality is marginal for vloggers or streamers, but TV broadcast quality equipment is superior for the production of the best quality video footage. Professional studios are typically looking for individual components that they piece together and not a kit, which is why we didn’t include anything at that level on our list.
Things To Consider for Vloggers
Since Vloggers are usually doing a variety of different video types, it’s important to be able to change the screen color or pack it away entirely, depending on the situation. Each scene will have to be carefully set up to ensure that the Chroma Key effect looks good during production so you can avoid a post-production editing nightmare. Since the scene types will likely vary from shoot to shoot, the lights can be used for other shots. You may already have a three or four-point set of lights, so you will have to figure out what kit is the most appropriate for you.
Things To Consider for Streamers
Typically, streamers are going to be sitting in a chair in front of their screen and disassemble it when they are not using it. They may also want to roll the screen up and move the stand away, but options like having extra white and black backgrounds are not necessary. These screens are typically easy to set up for streamers as their position doesn’t usually change from one streaming session to another. Still, properly lighting them can be a bit of a challenge as the desk or computer they are sitting at may interfere with the subject light positioning.
How To Use Your Greenscreen
The first step is to set up the green screen on the stand and make sure it is tightly clamped to the stand. It is not required to iron or steam the screen to remove the wrinkles, but those wrinkles can produce shadows that will interfere with the effect. You can optionally stretch the screen as tightly as possible so that they are not visible, but we recommend steaming them smooth or ironing them out.
If you are planning on taking a video of a subject where the floor is visible, you will also need to lay the screen out across the floor. You want to curve the screen where it meets the floor to prevent the screen from folding or creasing.
The most critical step to using a green screen is setting the lights in a way where the screen is lit evenly. If you skip this step, you will likely end up spending a lot of time messing around in video editor software, trying to correct this issue. The best solution that we have found is to use a green screen app on your smartphone or tablet to adjust the position of your lights in such a way where there are no hot spots.
You should then position the subject in front of the screen and verify that it is not casting a shadow. If it is, you will need to move the subject further from the screen. Once the subject is positioned correctly, then proceed to adjust the position of the lights to light it properly.
Conclusion
Having the ability to shoot video in front of a green screen is an excellent way to diversify the content that you produce. Having a quality kit with a proper light set will help you save time during post-production and will result in near professional-quality video. We hope that you enjoyed our list and can get started on your next video or stream!
